Minimal installation of Solaris 10 with Sun Studio: System installation
3. Post-install setup
3.1. Adding a regular user
It is recommended to add a regular user for the normal work (for security reasons). Also, the remote SSH login of the “root” superuser is disabled by default - the “root” user access over SSH can be enabled, but it is disabled for security reasons, so I generally prefer to keep it that way and create the additional “regular” user.
A new user can be added via the "useradd" command, and the password set via the "passwd":
# useradd -m -d /export/home/my_username -s /usr/bin/bash my_username
UX: useradd: my_username name too long
# passwd my_username
New Password:
Re-enter new Password:
passwd: password successfully changed for my_username
The "-m -d" is to create the home directory and its location.
Note that the standard location of home directories in Solaris is not “/home” as usual in Linux, but “/export/home” (see here for details: Difference between “/export/home” and “/home”).
The user is now created with the Bash as the default shell (you can choose any other shell or not use the "-s" parameter to keep the default “/bin/sh” shell).
The “username too long” warning can be normally ignored (only some special services might require the name to be shorter than 8 chars, but I didn’t hit any issues with longer usernames so far).
To change the default shell for the root user as well, you can do:
# usermod -s /usr/bin/bash root
UX: usermod: root is currently logged in, some changes may not take effect until
 next login.
To perform administrative tasks when logged as a regular user, the "su" command needs to be used to switch to the “root” account (Solaris does not provide the "sudo" command):
-bash-3.2$ su -
Password:
Oracle Corporation      SunOS 5.10      Generic Patch   January 2005
-bash-3.2#
Note the different prompt strings for the regular user (ending with the "$" character) and the administrator account (ending with "#").
This is the default, but the prompt strings can be changed.
3.2. SSH access
The SSH server should already be running, and you can use the previously created regular user to log in via SSH or Putty (see also here: SSH password-less login). If the DHCP was selected during the installation, you will not be able to connect via the hostname, only by the IP address (the setup of the host name is explained later).
The IP address to connect to can be shown by the "ifconfig" command:
# ifconfig -a
lo0: flags=2001000849<UP,LOOPBACK,RUNNING,MULTICAST,IPv4,VIRTUAL> mtu 8232 index 1
        inet 127.0.0.1 netmask ff000000
e1000g0: flags=1004843<UP,BROADCAST,RUNNING,MULTICAST,DHCP,IPv4> mtu 1500 index 2
        inet 192.168.0.100 netmask ffffff00 broadcast 192.168.0.255
The SSH access will be also used for transferring the downloaded additional packages (Sun Studio, Java) to the machine.
3.3. Path to the GCC compiler and tools
The GCC compiler and tools are located under “/usr/sfw”, which is not in the path by default. The path can be added in the “/etc/profile”, but it is better to add it to the “/etc/default/login” file, to be also available for the non-interactive shells - this is in particular essential to work within Jenkins build slave (which runs under a non-interactive shell).
This needs to be done under the “root” user ("su -"):
# chmod u+w /etc/default/login
# vi /etc/default/login
(need to change the permissions first, because the file is read-only by default)
Find the PATH setting (commented out by default) and change it to (or add):
PATH=/usr/bin:/bin:/usr/sbin:/usr/sfw/bin:/usr/sfw/i386-sun-solaris2.10/bin
(the path “/usr/sbin” is mostly relevant to the “root” superuser, as the regular user can only run few commands present there, for example "ping")
At this point, you can add the paths for the Sun Studio and the CSW packages as well, to not have to repeat the setting later:
PATH=/usr/bin:/bin:/usr/sbin:/opt/csw/bin:/opt/solarisstudio12.4/bin:/usr/sfw/bin:/usr/sfw/i386-sun-solaris2.10/bin
When done, it is recommended to change the permissions back to read-only:
# chmod u-w /etc/default/login
For the settings to take effect, logout and login back (or restart the machine).
Confirm the installation by checking the "gcc" (GNU C compiler) and "g++" (GNU C++ compiler) commands - under the regular user:
$ which gcc
/usr/sfw/bin/gcc
$ which g++
/usr/sfw/bin/g++
$ gcc --version
gcc (GCC) 3.4.3 (csl-sol210-3_4-branch+sol_rpath)
...
$ g++ --version
g++ (GCC) 3.4.3 (csl-sol210-3_4-branch+sol_rpath)
...
Note that the GCC compiler shipped with the system is of a relatively old version, so you might want to install a newer one (can be done via the CSW repository).
3.4. Shutting down/rebooting the system
Similar to Linux, the Solaris 10 can be shutdown/rebooted by the "shutdown" or "init" commands (both can only be run under the “root” administrator account, and located under “/usr/sbin”).
To shutdown:
# shutdown -y -i5    # shutdown with grace period (-g0 for immediate shutdown)
# init 5             # alternative
# poweroff           # alternative
To restart:
# shutdown -y -i6    # restart with grace period (-g0 for immediate restart)
# init 6             # alternative
# reboot             # alternative
The “shutdown” command is the most graceful option, especially if multiple users might be using the machine - it allows a grace period, and sends broadcast messages to the connected users, that the system is about do go down or reboot.
3.5. Mounting the CD/DVD device
The CD/DVD device needs to be mounted if you e.g. want to install additional packages.
The device names are different to Linux, so you need to know the scheme to be able to mount them.
All needs to be performed under the “root” user, i.e. if logged under a regular user, elevate the rights via "su -". The “standard” CD/DVD device name is usually “c1t0d0”.
To mount the CD/DVD device (using "mkdir" to create the mount directory if it does not exist yet):
# mkdir /cdrom
# mount -r -F hsfs /dev/dsk/c1t0d0s0 /cdrom
Note the “s0” is added at the end - “c1t0d0” is the entire physical device, the “s_n_” is the n-th partition of the device (zero-based index).
If the device above is not found, you’ll need to list the devices to find out the correct device name.
This can be done with the "iostat" command:
# iostat -En
c0d0 Soft Errors: 0 Hard Errors: 0 Transport Errors: 0
Model: VMware Virtual Revision: Serial No: 000000000000000 Size: 21.47GB <21474754560 bytes>
Media Error: 0 Device Not Ready: 0 No Device: 0 Recoverable: 0
Illegal Request: 0
c1t0d0 Soft Errors: 0 Hard Errors: 0 Transport Errors: 0
Vendor: NECVMWar Product: VMware IDE CDR10 Revision: 1.00 Serial No:
Size: 0.00GB <0 bytes>
Media Error: 0 Device Not Ready: 0 No Device: 0 Recoverable: 0
Illegal Request: 6 Predictive Failure Analysis: 0
Here the CD device name is the “c1t0d0” (“c0d0” is the first hard drive).
See here for further details: How to mount the CD-ROM on Solaris 10
3.6. Boot manager menu
To edit the boot menu, use the "bootadm" command to find out the path of the active configuration:
# bootadm list-menu
The location for the active GRUB menu is: /rpool/boot/grub/menu.lst
default 0
timeout 10
0 Oracle Solaris 10 1/13 s10x_u11wos_24a X86
1 Solaris failsafe
Then you can edit the boot menu:
# vi /rpool/boot/grub/menu.lst
Here you can do for example:
Changing the boot timeout
Update the value of the “timeout” setting.
Disabling the USB (EHCI, UHCI)
As already mentioned before, under QEMU the USB device drivers can cause issues, you might also want to disable the USB devices in case you do not plan to use them.
To disable, find the current active boot option and add the parameters to disable the EHCI/UHCI:
title Oracle Solaris 10 1/13 s10x_u11wos_24a X86
findroot (pool_rpool,0,a)
kernel$ /platform/i86pc/multiboot -B $ZFS-BOOTFS,disable-ehci=true,disable-uhci=true
module /platform/i86pc/boot_archive
The USB device drivers will be disabled after the next reboot.
3.7. Network setup
Setting up the hostname (DHCP)
If the system has been configured to use DHCP, no computer name has been defined explicitly and therefore it shows as “unknown”. The system tries to receive the hostname via DHCP, but most DHCP servers do not supply the host names nowadays (and the DHCP server would need to be configured with hostnames for each particular machine anyway). This problem does not exist if the static IP has been defined and you provided an explicit computer name, nevertheless it is easy to fix.
First, disable the retrieval of the hostname over DHCP (so the system will not try to retrieve the name any more):
# vi /etc/default/dhcpagent
Find the value “PARAM_REQUEST_LIST” there, and remove the value “12” from it:
# Before:
PARAM_REQUEST_LIST=1,3,6,12,15,28,43

# After:
PARAM_REQUEST_LIST=1,3,6,15,28,43
Do the same for the “.v6.PARAM_REQUEST_LIST” if you enabled IPv6.
Next set the hostname in the “/etc/nodename” file:
# vi /etc/nodename
Insert the host name there.
Last location to set the hostname is for resolution from other machines over a particular network interface (note that each network interface can be set with a different hostname, although it is not recommended). To set the hostname for network interface “e1000g0”:
# vi /etc/hostname.e1000g0
Insert the following there (“test-sol10” is the example host name):
inet test-sol10
You could also notice the error message regarding the “loghost” (which should point to the local machine):
syslogd: line 24: WARNING: loghost could not be resolved
This can be fixed by updating the “/etc/hosts” file:
# chmod u+w /etc/inet/hosts
# vi /etc/inet/hosts
Add the “loghost” at the end of the “localhost” line:
127.0.0.1 localhost loghost
As you might notice, the file was originally write-protected (needed to "chmod" to be able to edit it even under the “root” user), so the permission to write should be removed again:
# chmod u-w /etc/inet/hosts
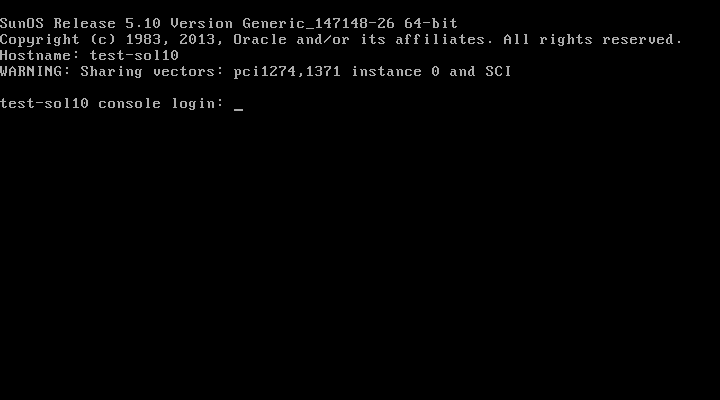
Restart the machine to apply the new settings. The new host name should now be shown, there also should not be the “loghost” warning any more:

The "hostname" command should now also show the new host name:
$ hostname
test-sol10
Now the Solaris 10 machine should be also reachable from other UNIX / Linus machines via the hostname. Nevertheless, the host name will still not be resolved from Windows machines, because Windows uses a different protocol.
Setting up NetBios name for Windows clients (Samba/WINS)
As mentioned, Windows uses different means than Linux to resolve the local network machines via hostnames (the older NetBios protocol). Therefore to resolve the Solaris 10 machine from Windows, the system must be set up specifically via Samba/WINS.
We will not actually configure and launch the Samba server (although this can be done as well, if you want to access drives in Solaris via regular Windows/Samba shares, but it is not covered by the article). Still for the WINS resolution to work, the Samba server must be installed and partially configured on the Solaris machine.
If you do not need to access the machine from Windows via hostname, then this step can be skiped.
If you did not install the Samba packages during the installation, you can do that manually as well. First, you need to insert and mount the installation media.
Then the required packages can be installed by the "pkgadd" command (under the “root” user, obviously):
# pkgadd -d /cdrom/Solaris_10/Product SUNWsmbar SUNWsmbac SUNWlibpopt SUNWsmbau SUNWsfman
Once the packages are there, we will just copy the default configuration and enable the WINS service:
# cp /etc/samba/smb.conf-example /etc/samba/smb.conf
# svcadm enable wins
The status can be tested by:
# svcs -a | grep wins
online         18:52:56 svc:/network/wins:default
Now the WINS service should already be running and the Solaris machine resolvable from Windows via name. If it does not work yet, try to restart the machine and/or wait for some time first.


Leave a comment