
Minimal installation of Solaris 10 with Sun Studio
2. System installation
2.1. Booting the installation media
Insert the installation media and start the machine.
If there is already an OS installed on the machine, you might need to change the order of boot devices in the BIOS, so that the CD/DVD device will be booted first before the hard drive. However, if the hard drive is empty, leave the CD/DVD device as secondary boot device after the hard drive, so that the installer does not start again after the installation is complete.
When creating a virtual machine, the recommended size of the HDD to create is 20 GB (see later in the article, how to add additional disk for extra data).
When booted, the installer boot manager appears:
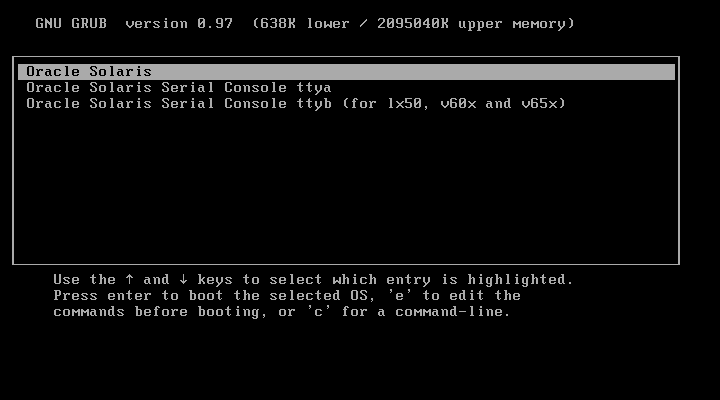
Here you can either start the installation, or press the ‘e’ key to edit the boot commands first.
Disabling the USB (EHCI and UHCI) support
If the Solaris 10 is used under QEMU (for example in QNAP NAS Virtualization Station, which uses the QEMU under the hood), it is recommended to disable the USB EHCI and UHCI support, as those are not virtualized well and Solaris 10 then spends a considerable amount of time trying to detect the devices (which is not able to do at the end anyway).
To disable, press the ‘e’ key upon the above boot screen, then press it again to edit the first line (starting with “kernel$”) and add the following to the end of the line:
,disable-ehci=true,disable-uhci=true
Then press ‘Enter’ to return back, and the ‘b’ key to start the boot process.
2.2. Starting the installer
After the installer boots up, select the installation option 4 to start the installation in the “Interactive Text” mode:
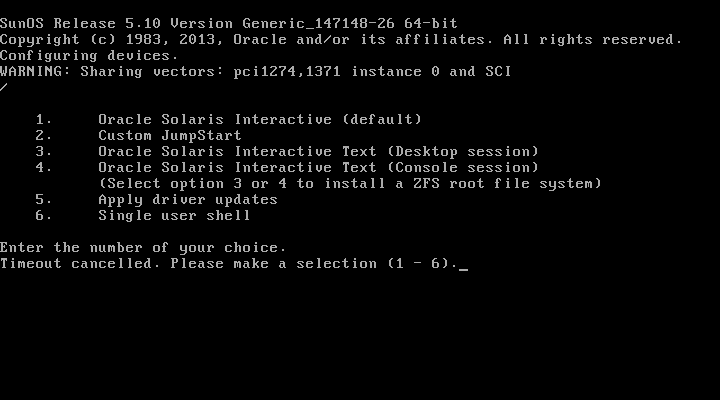
The option 3 or 4 is required when the ZFS is to be used, which is recommended (supports wide range of features, like snapshots etc.).
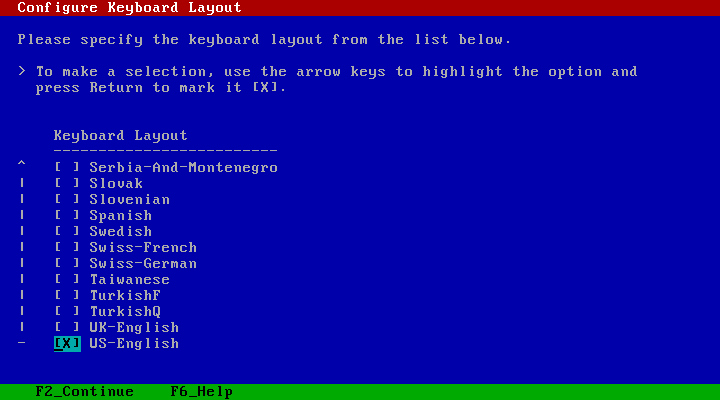
Next is setting of the keyboard layout - note that the choice is not confirmed by the ‘Enter’, but by the ‘F2’ key:
Bunch of next dialogs follow, before setting up the network.
2.3. Initial network settings
The network connectivity setup:
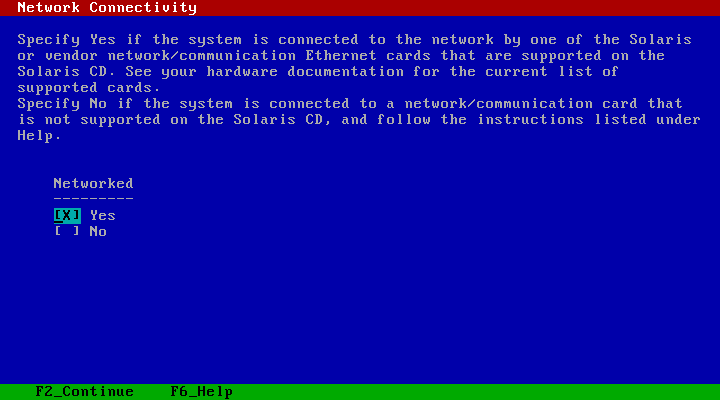
Normally the system should be using DHCP, which assigns the IP address to the machine accordingly.
If the static IP address is needed, it can be setup there as well. In that case, you’ll need to choose the host name of the machine, the IP address and provide the gateway (“router”) IP address.
In the case of DHCP selection, the installer does not ask for the host name, and the system will try to get the host name over the DHCP as well. However most of the DHCP servers do not provide the host names nowadays (would require a special setup on the DHCP server), so the host name will be set later after the basic installation is done.
Recommended network settings:
- Networked: Yes
- Use DHCP: Yes
- Enable IPv6: No
Further network settings, which I used in my case:
- Configure Kerberos: No
- Name service: None
(or DNS, but that is only required when using the static IP address - with DHCP, DNS servers will be retrieved from the DHCP server even with setting this to None) - Use the NFSv4 domain derived by the system
2.4. System settings
Follow some settings of the system:
- Time Zone: Select appropriately
- Root password: The main administrator user password
- Remote services: No (only SSH will be allowed initially)
- Register: No
-
Proxy server: Set appropriately
- Installation type: F2 (Standard)
- iSCSI target: Select appropriately (note that iSCSI drive requires additional settings)
- Automatically eject CD/DVD
- Auto Reboot
- Media: CD/DVD
- Regions: Select appropriately (can be skipped to use default US setting; select North America/U.S.A. (UTF-8) to allow setting locale to UTF-8)
- Locale: Select appropriately (POSIX C the default)
- Additional Products: None
- Filesystem: ZFS (or UFS according to preference)
2.5. Software selection
For the minimal installation, select the option: “Reduced Networking Core System Support”.
This is to perform the minimal text-based install.
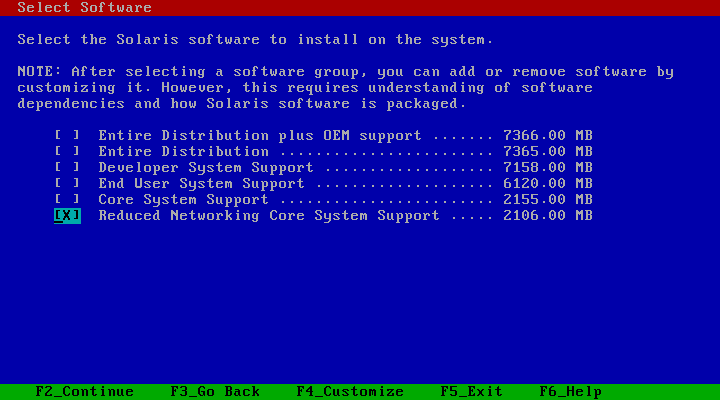
Do not press the F2 yet, but press the F4 key instead to customize and add extra packages, required for using the SSH, installing the Solaris Studio etc.
Alternatively you can select the “Developer System Support” (Sun Studio installer actually complains if this or the “Entire Distribution” option is not selected, but if the required packages are added manually, the Sun Studio will install and work properly). But as you can see, this option install a lot more packages, including the full graphical desktop, which you might not want or need for the minimal system.
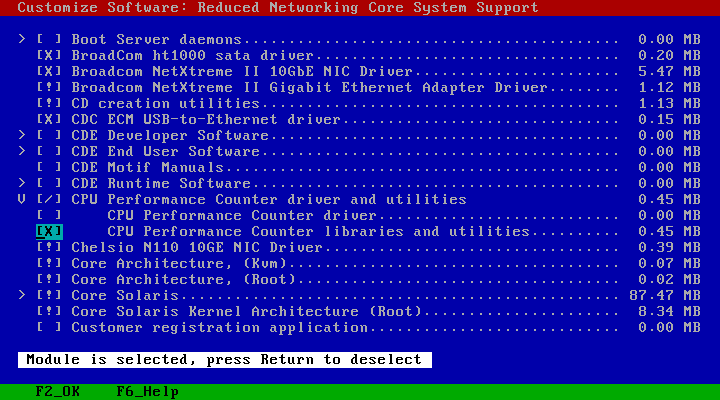
When selected the minimal install option and F4 to customize, add the following packages (some just for convenience, some required for the Sun Studio or Java):
- A Windows SMB/CIFS fileserver for UNIX (the entire group):
- Required for: NetBios name resolution (from Windows)
- If you do not need to access the machine via hostname from Windows, does not need to be installed
- Can be also installed later if needed
- Apache Standard C++ Library:
- Required for: The Oracle Solaris Studio
- BIND DNS Name server and tool:
- Required for: DNS name resolution
- Installs the “nslookup” tool for troubleshooting the networking issues
- Basic IP commands (Usr):
- Installs the “ping” command
- CPU Performance Counter driver and utilities (open the group by ‘Enter’ on the ‘>’ before the group name)
- CPU Performance Counter libraries and utilities:
- Required for: The Oracle Solaris Studio
- CPU Performance Counter libraries and utilities:
- Documentation tools:
- Installs the “man” command
- Freeware Other Utilities (open the group)
- The GNU pager (less):
- Installs the “less” command
- The GNU pager (less):
- Freeware Shells (open the group)
- GNU Bourne-Again shell (bash):
- I prefer to use this shell (see below how to set the bash shell as default)
- zsh can be selected here as well, if you prefer or plan to use it
- GNU Bourne-Again shell (bash):
- GNOME Runtime (open the group)
- The Python interpreter, libraries and utilities
- The Python interpreter, libraries and utilities - development files
- Required for: The Oracle Solaris Studio
- GNU binutils, C compiler, m4 and make (open the group)
- GCC Runtime Libraries
- binutils - GNU binutils
- gcc - The GNU C compiler
- gmake - GNU m4
- gmake - GNU make
- Not required, only if you plan to use the GCC compiler as well
- GNU wget (the entire group):
- Installs the “wget” command
- not selecting any additional Java packages:
- Java 8 will be installed later from the downloaded package
- Lint Libraries (usr):
- Required for: The Oracle Solaris Studio
- Motif RunTime Kit
- Required for: The Java 8 SDK
- PICL Framework, Libraries, and Plugin Modules (the entire group)
- PICL Header Files (Usr)
- Required for: The Oracle Solaris Studio
- Portable layout services for Complex Text Layout support
- Required for: The Java 8 SDK
- Programming tools and libraries (open the group)
- Math & Microtasking Libraries (Usr)
- Math & Microtasking Library Headers & Lint Files (Usr)
- Solaris Bundled tools
- Solaris cpp
- Required for: The Oracle Solaris Studio
- Secure Shell (the entire group):
- Installs the SSH server for remote login
- SunOS Header Files:
- Required for: The Oracle Solaris Studio
- rsync:
- Not essential, but can be handy
After selecting all the additional software, press F2 to continue.
The package manager will select some additional dependencies, press F4 to preserve all the required dependencies:
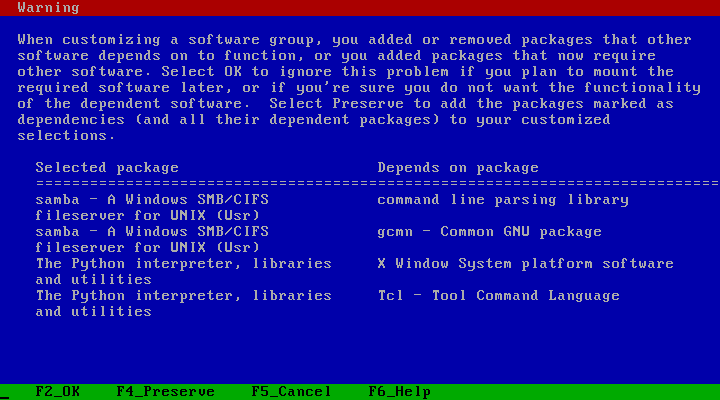
See here for the list of Solaris Studio requirements: Oracle Solaris Studio 12.4 - Required System Software Packages
2.6. Install disk selection
In the next step, the disk for the installation can be selected:
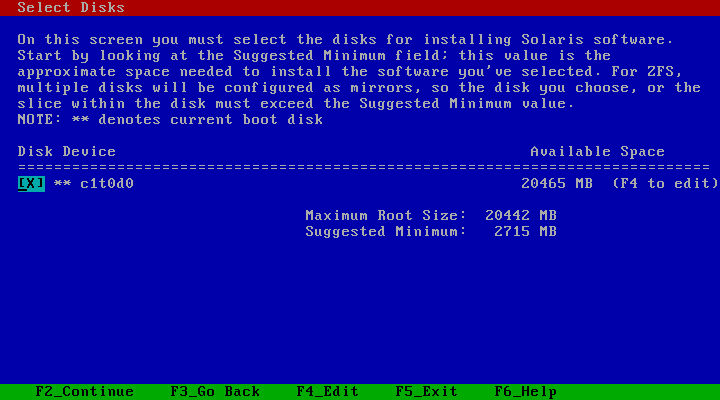
Here you can confirm the defaults and continue by F2, or press F4 and make changes.
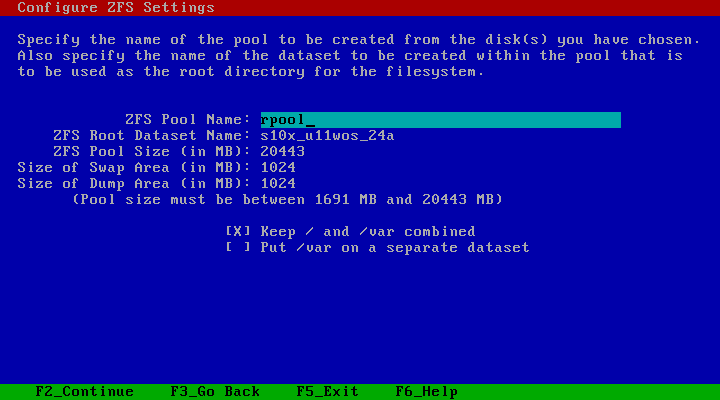
Next is to configure the ZFS settings (if the ZFS was selected before). I’ll usually leave the defaults:
Afterwards there are few other confirmation dialogs and the installation begins. Wait for the installation to complete and restart. If you changed the order of boot devices in the BIOS to boot from CD/DVD device first, you’ll need to remove the installation media or change the boot order back to start from the HDD first (recommended), otherwise the installer will start again.
On the first boot, the machine should start into the text console (as we didn’t install the graphical desktop with the minimal installation), where you can login into the root account with the password you set during the installation:
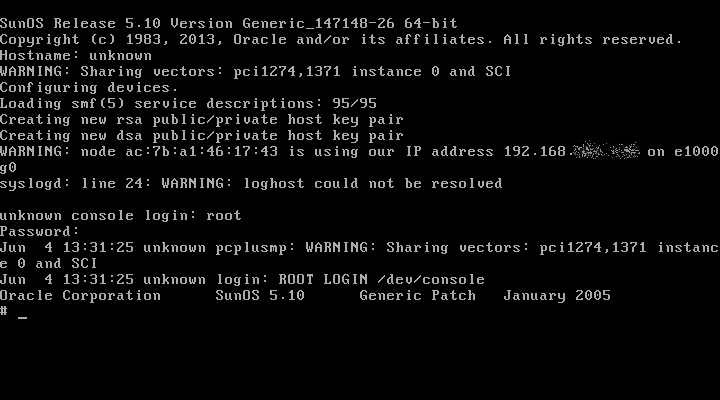
The default shell is “/bin/sh”, you can type "bash" to switch to the bash shell (if you installed it).
Note that the hostname is reported as “unknown”, because the DHCP server didn’t configure it (but you can see that the IP address has been configured over the DHCP). We will set the host name manually later (alternatively the DHCP server would have to be configured to know which host name it should push for the particular machine).


Leave a comment